We have all seen the Oracle docs on the OCI CLI, and a lot of the stuff in my subsequent blogs will be talking about OCI’s API’s (https://docs.oracle.com/en-us/iaas/tools/oci-cli/3.29.2/oci_cli_docs/index.html) and command line interface that allows you to do a lot more than you can do in the console, so this blog just sets the scene for the rest of the ones coming later. Before I go into the subject of this blog (multi-region), I just thought I would summarise what you need for the OCI CLI:
- An environment
- Oracle Linux deployed into OCI comes with the OCI CLI pretty much already installed. You also have the Cloud Shell feature within OCI which gives you an on-demand, pre-configured environment to run OCI command. The great thing about the Cloud shell is that you can save scripts in there and it keeps them, but you don’t pay for it. The disadvantage is that you can’t schedule stuff, so you need a linux box with cron for that (ok, you can do it on windows, but I’m not going to touch that!)
- For a linux box, we always set up a 1OCPU, always-free instance in any tenancy, install/configure the OCI CLI, and also a few other things in there (like the very popular OCI scheduler which controls environments and can shut them down (check out this blog https://oc-blog.com/2019/01/03/auto-start-stop-compute-instances/). Once you have your linux box install python-oci-sdk following this doc (https://docs.oracle.com/en-us/iaas/Content/API/SDKDocs/cliinstall.htm#InstallingCLI__oraclelinux7)
- Credentials
- Once you have the OCI CLI set up, you need to configure it. There’s a standard function to do this, but you need some information first. In the console create an API key, get the certificate and fingerprint, and you’re pretty much ready to go. That previous doc walks you thought most of this, but you also need this one to generate the key (https://docs.oracle.com/en-us/iaas/Content/API/Concepts/apisigningkey.htm#Required_Keys_and_OCIDs)
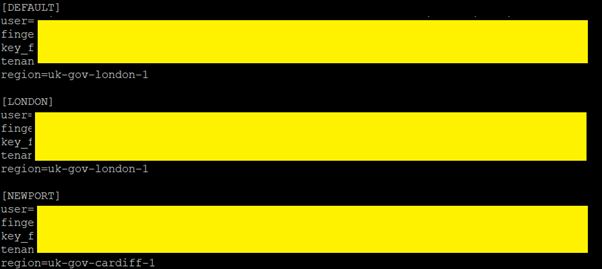
OK, so now you’re ready to go. The OCI CLI config will create a directory in your $HOME called .oci, which has a single file in it, “config”, which looks a bit like this:

The problem with the OCI CLI is that if, for example, you want to view all the instances you have in a compartment and you use a the command “oci compute instance list –compartment XXX”, it will only show the instance in your current region, which is defined by the “region=” value in the config above.
So, duplicate the section above (leave the default in place), copying everything but instead of DEFAULT, put a user friendly name, and just change the region for each e.g.
Now you have your config file, how do you use it ? It’s simple because the OCI CLI uses an environment variable OCI_CLI_PROFILE which defines the profile it’s using to connect, with a blank value being “DEFAULT” (which is why you need to leave DEFAULT in there.
Add the following script to you $HOME/.bashrc file, and you will have an easy to use choser system to switch between regions:
# User specific aliases and functions
echo “”
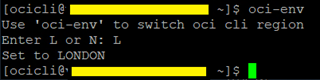
echo “Use ‘oci-env’ to switch oci cli region”
echo “”
function oci-env() {
echo “Use ‘oci-env’ to switch oci cli region”
read -p “Enter L or N: ” location
location=`echo $location | tr [:lower:] [:upper:]`
case “$location” in
N)
export OCI_CLI_PROFILE=NEWPORT
echo “Set to NEWPORT”
;;
L)
export OCI_CLI_PROFILE=LONDON
echo “Set to LONDON”
;;
*)
export OCI_CLI_PROFILE=DEFAULT
echo “Set to DEFAULT”
esac
}
When you login to the account you will be told that all you need to do is type “oci-env” at any time, and it will prompt you to change your region.
You can obviously customise this script to include whatever regions and shortcuts you want. As a shortcut, you can also just use the setting of the environment variable in any OCI CLI scripts you write.

Leave a comment